
Upgrading The Steam Deck
The Steam Deck is a truly marvellous piece of hardware. Running off of a version of Arch Linux, selling good specs at a low cost, it is a good deal for anyone looking to play their Steam Library at a low cost.
The best model, in my opinion, is the 64 GB model. It costs $399 USD, and is exactly the same as the more expensive models save for a smaller hard drive.
The Steam Deck uses NVME drives which, while not the cheapest, have insane performance. The one that I used to upgrade my Steam Deck was the “Silicon Power 1TB UD90.” This is not a sponsored post, but it was the cheapest one at that size, at around 75$ for one TB.
So lets compare prices…a 64 GB model + 1 TB hard drive upgrade will cost you roughly $475 USD. The most expensive model of the Steam Deck, the 512 GB option, is $649 USD. By getting the cheaper model you get 500 GB more for 174 dollars less, not counting shipping and taxes. Its better all around to just get a cheaper model, and upgrade it. So in this article, I will show you how to do this. Keep in mind that this is the base model, not the new OLED Steam Deck. As far as I know the process is the same, but I cannot vouch for it.
To do these instructions you will need:
- A Steam Deck
- The case that came with your Steam Deck
- A Steam Deck compatible NVME SSD
- A couple of screwdrivers, preferably a set of them
- A USB that is at least 8 GB in size
- A Steam Deck Dock
Without these things, it will be much more difficult to pull this off.
[disclaimer] I forgot to take pictures while upgrading my deck. My coworker and good friend Zach also upgraded his and took pictures along the way. With his permission, I included them with this article to make it easier to follow. Thanks, Zach!
step zero
Turn off your Steam Deck. I hesitate to really call this a step because it should be common sense, but you never know these days. Turn it off, don’t turn it on again until you are done switching the SSD out.
step one
Put the Steam Deck in its case. You might wonder…why? Well, the Steam Deck case is indented as shown below so that the Steam Deck will stay in place. It’s easier to keep it there rather than balance it on its joysticks, and a case comes free with every Deck.
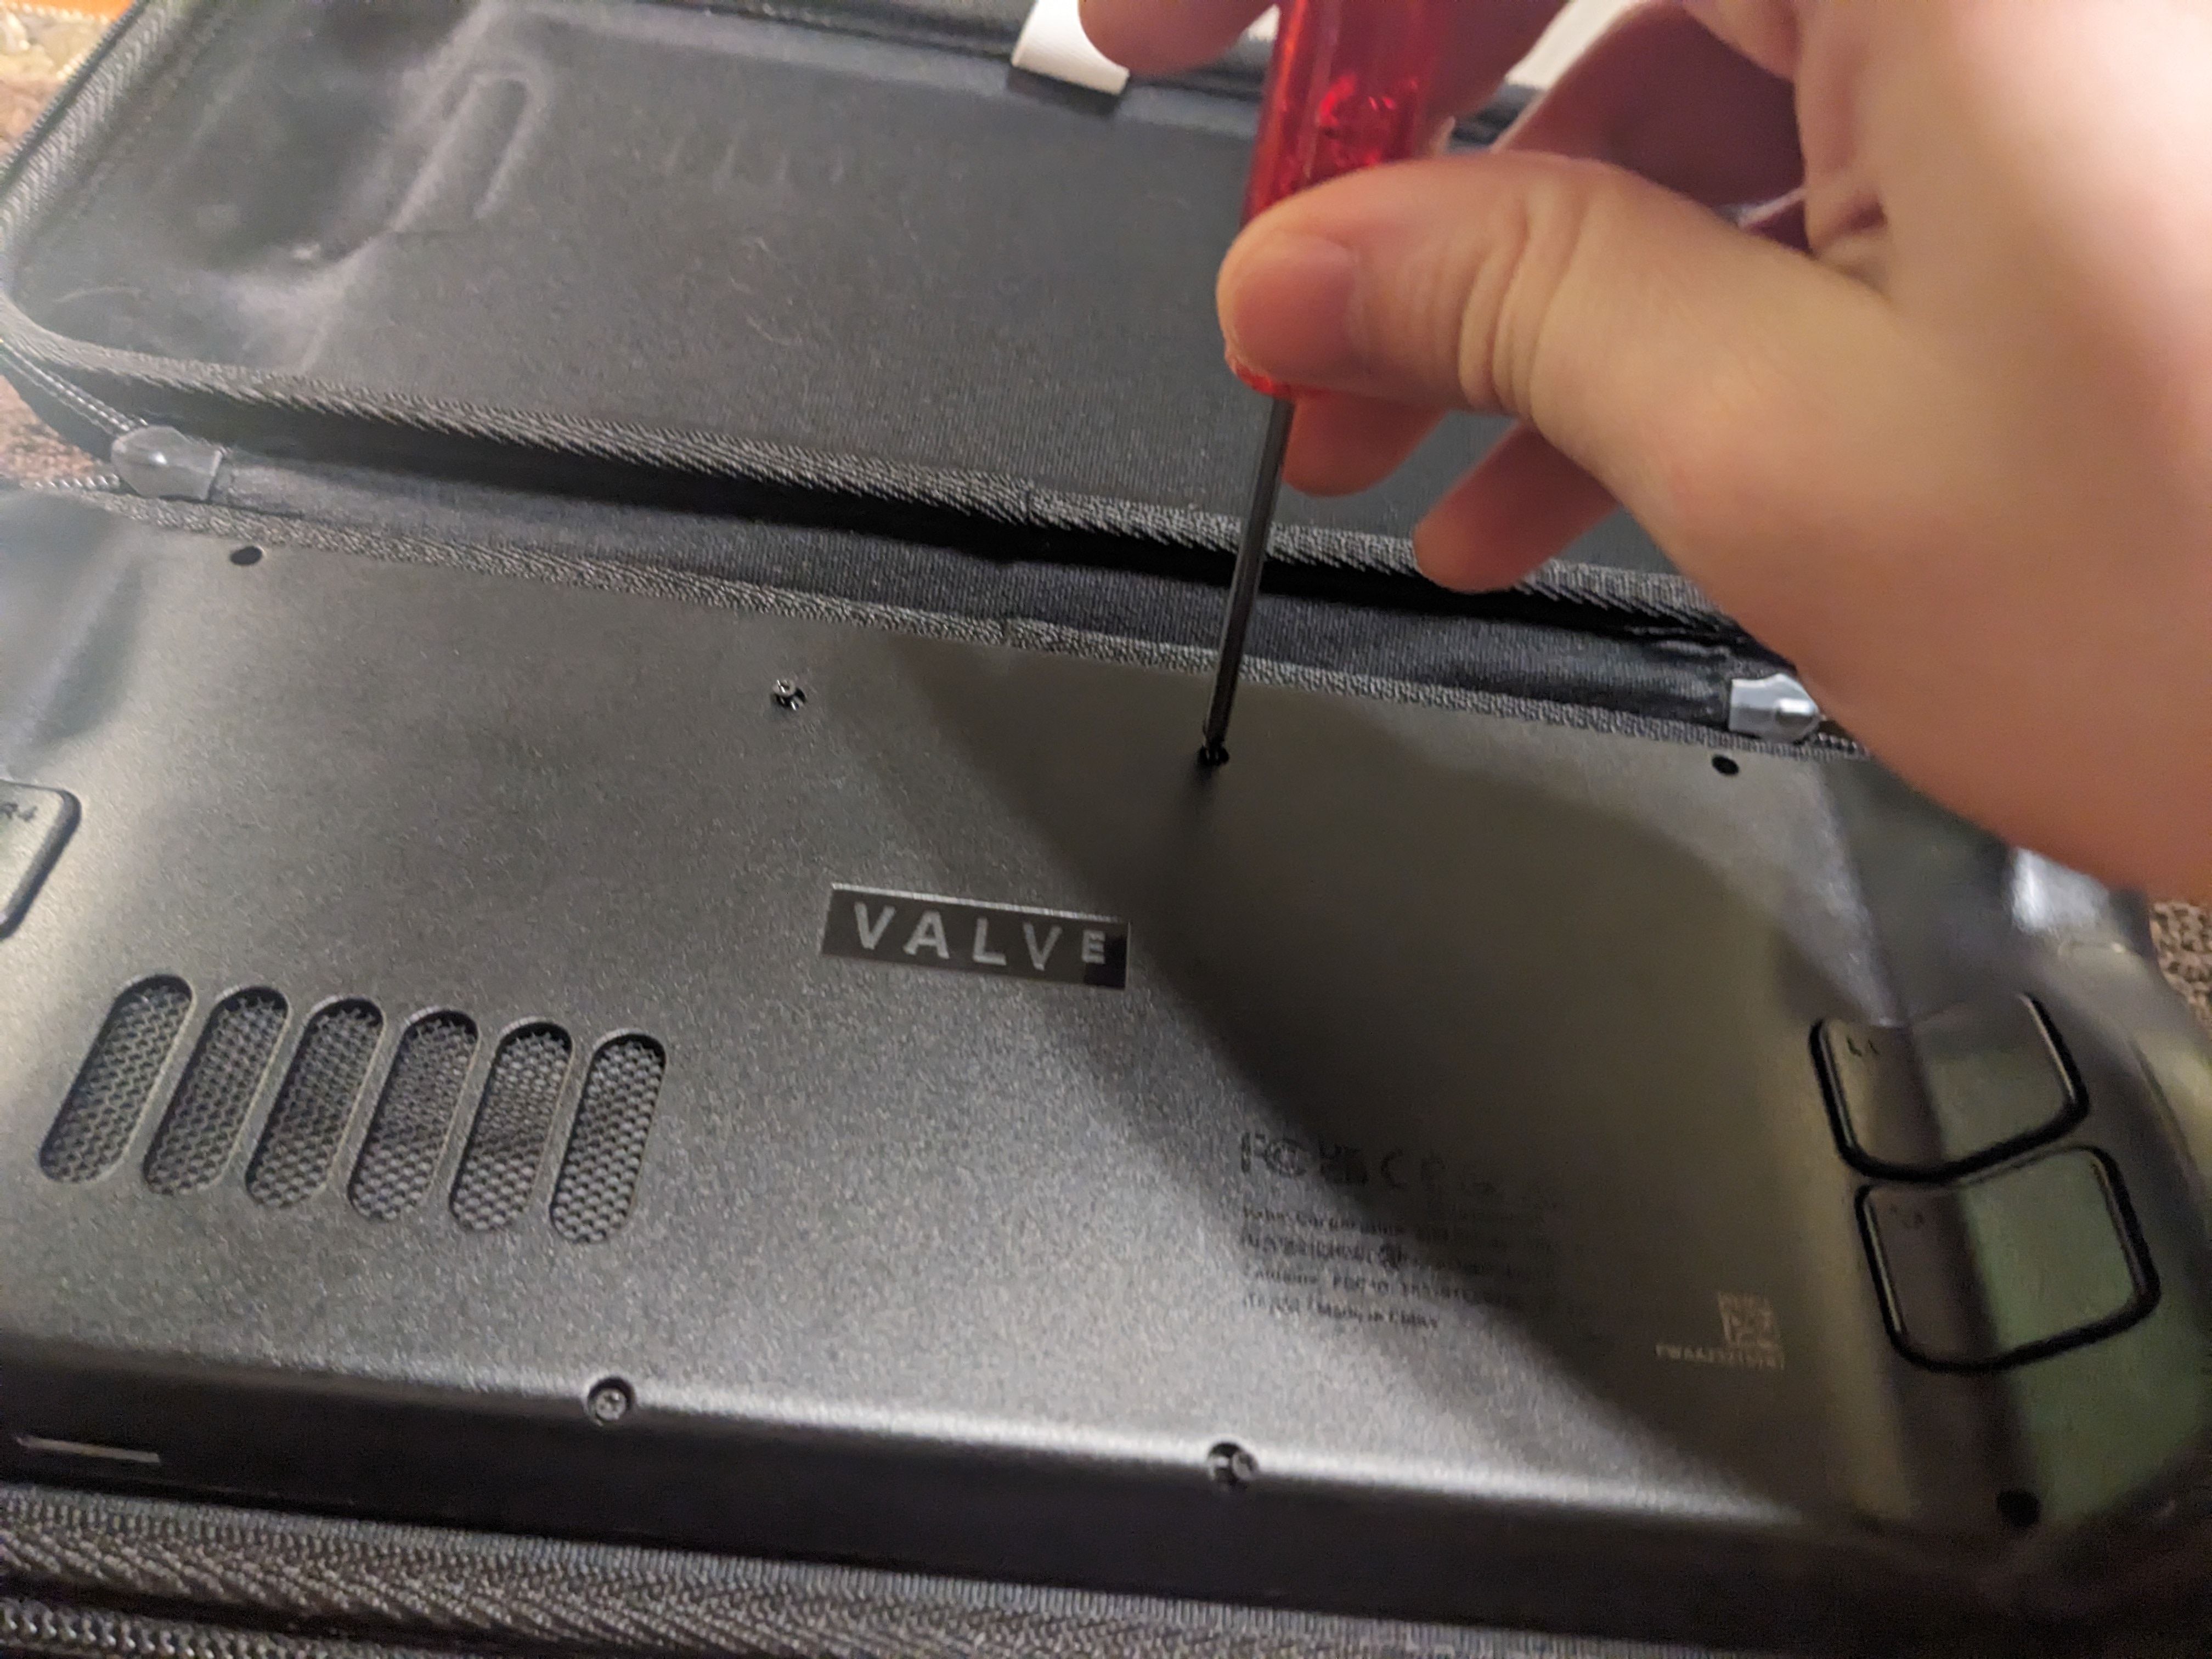
step two
Unscrew all the screws on the back. There should be about eight of them. Four big ones and four little ones. Use the appropriate size screwdriver for both sizes. The small ones in my experience were a lot harder to get out and nearly stripped, but they eventually budged. Just be careful.
step three
In step three, you will need to take off the backplate. This will feel weird and unnatural, but just be careful. I use a pry tool to get it open. You can use something similar, or if you don’t have one, use a flathead screwdriver to open it up.
step four
You will now need to unscrew the metal plate. This is covering the SSD, so to get to it, it will need to be removed. Depending, this step might vary. In the instructional videos I consulted while doing this, they showed three screws. My plate only had two. Also, the insides looked a bit different from what was displayed in a lot of other articles and videos displayed. I think there is a little difference between the older models and the newer ones. Just make sure all the screws are out of the plates, take it off, and set it to the side.
step five
After the plate is removed, unplug the battery. In the interest of total transparency, I could not get the battery to budge, so I did not unplug it. I was a bad boy that did a very dangerous thing, don’t be like me. It is generally supposed to be removed in case if something goes haywire. I skipped this step and was fine, but if you want to be extra cautious you can do it.
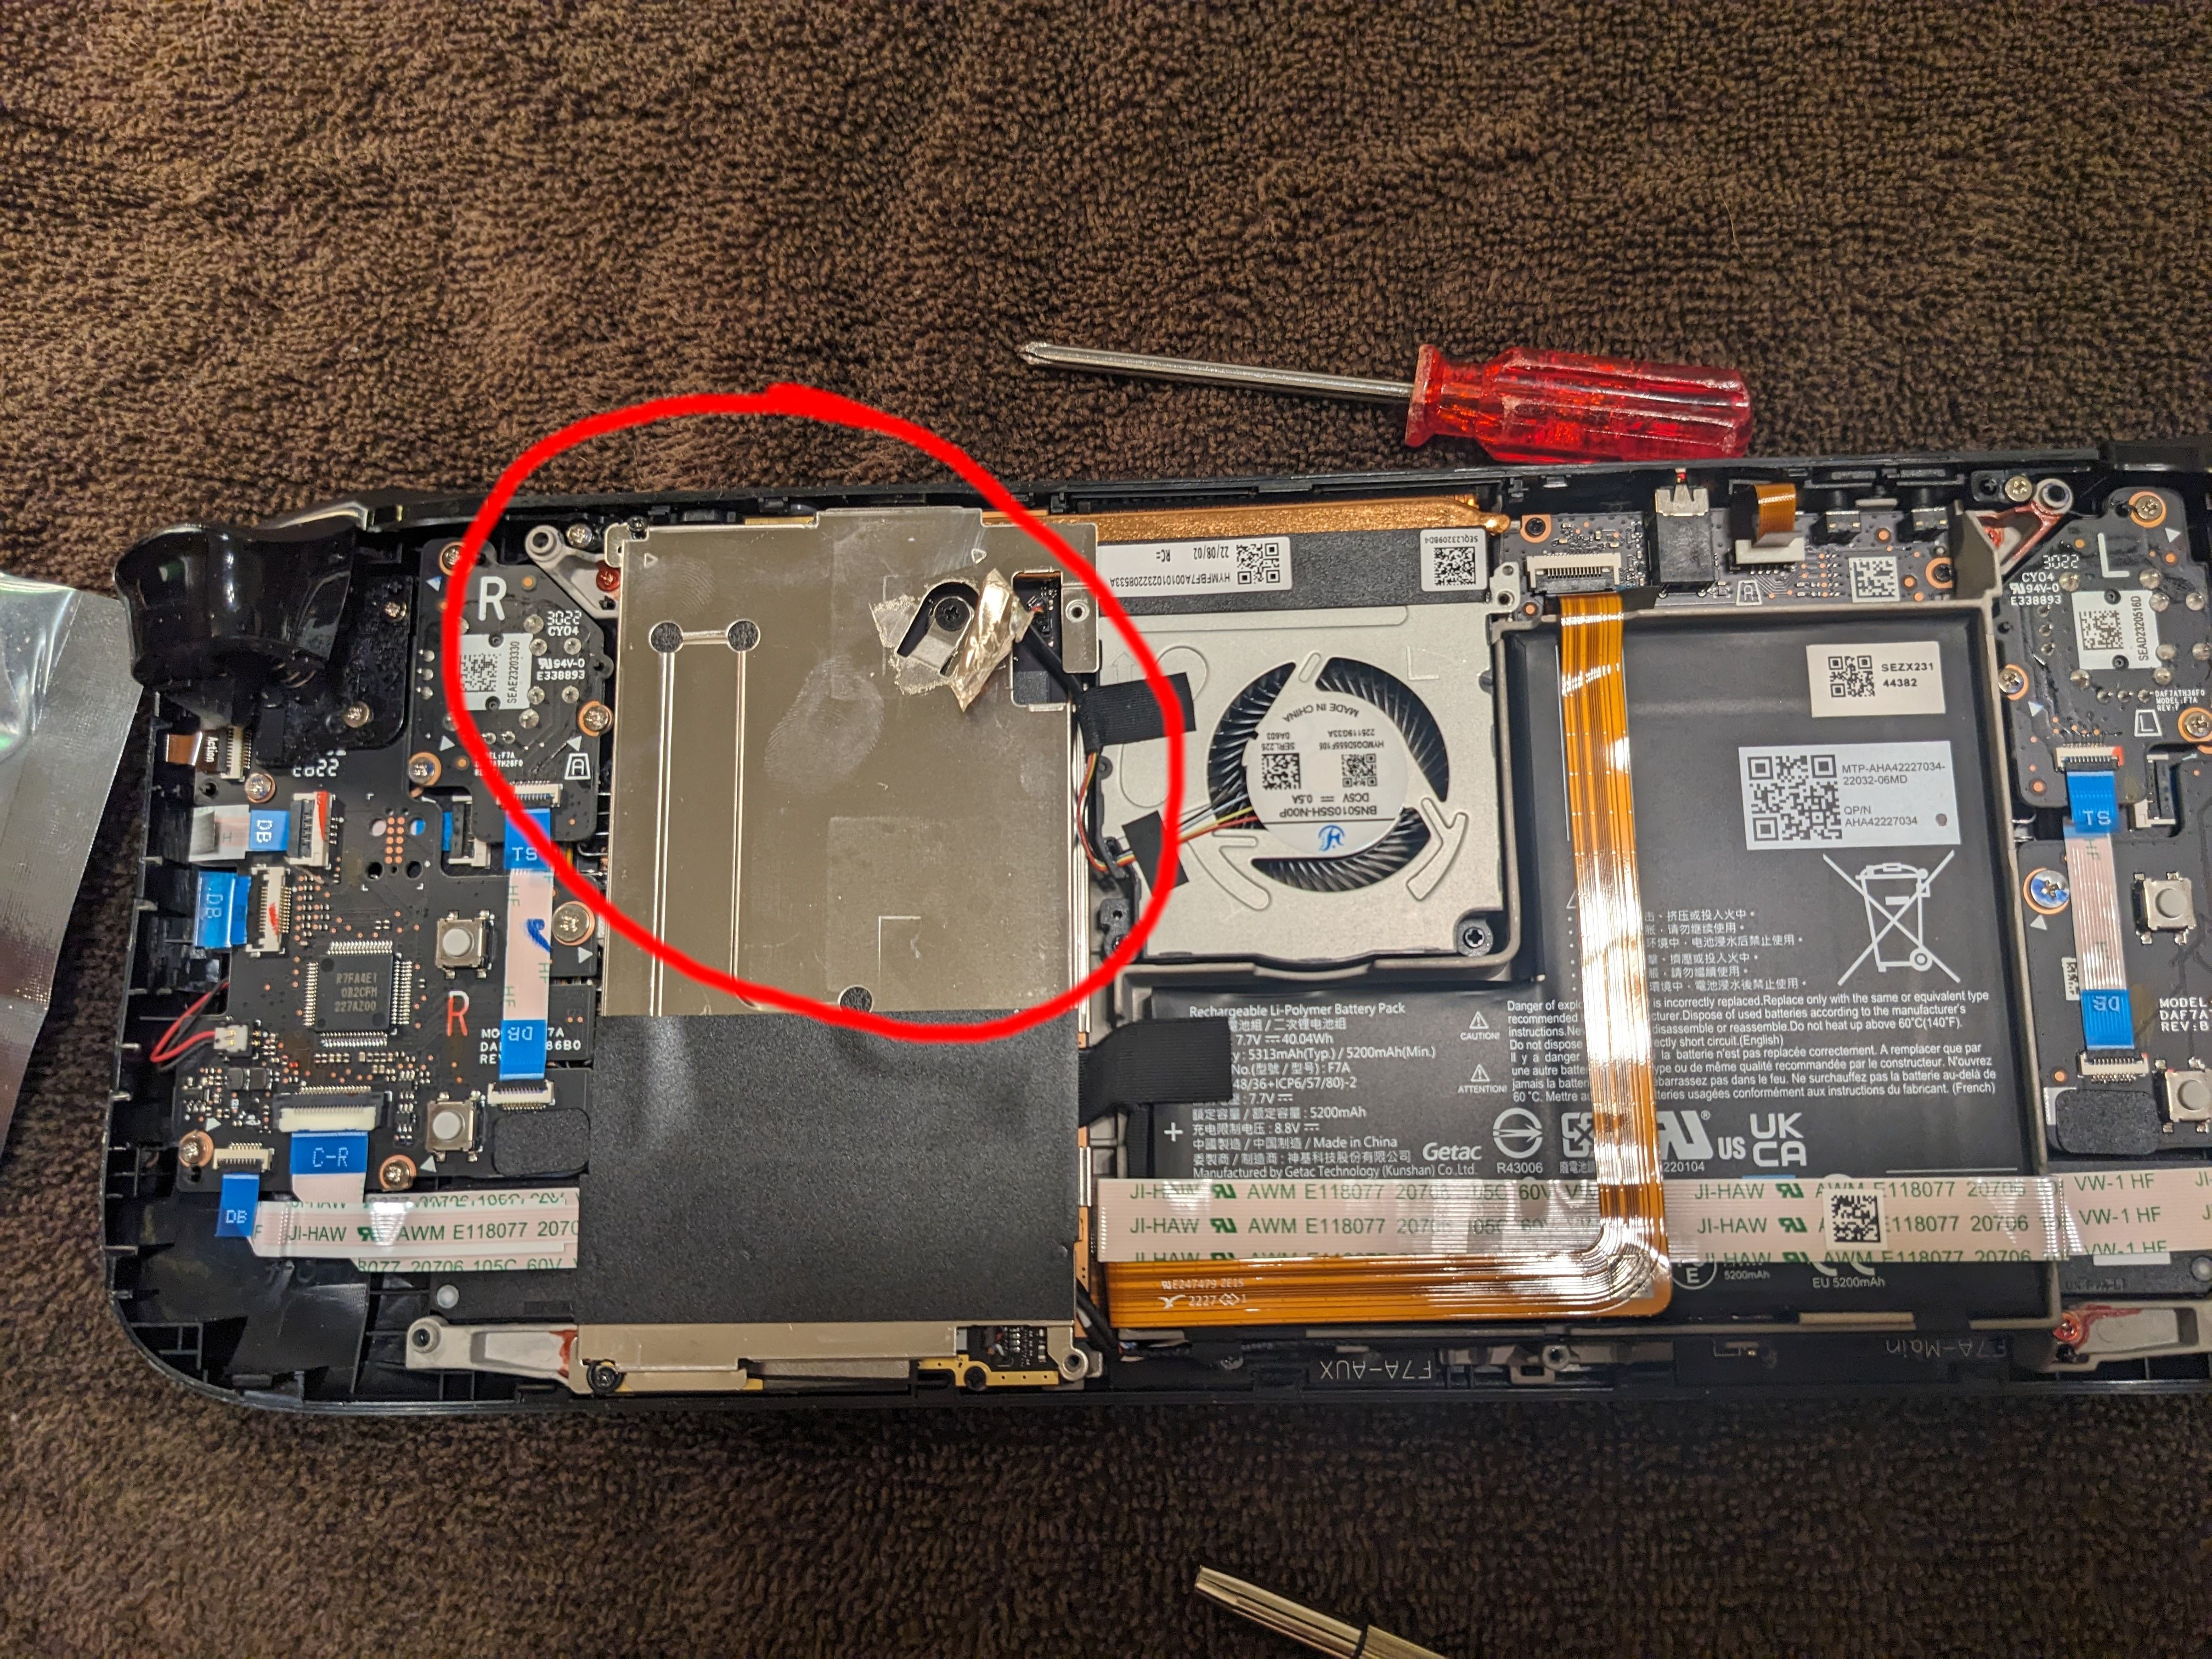
step six
Unscrew the SSD, and take it out. The picture down below is where the SSD is located. It should come out at an angle. Take off the sleeve, and put it on your new SSD. Like the other SSD, it should insert at an angle. Insert it into the slot and screw it down.

step seven
Put everything back. The faceplate, the backplate, everything.
step eight
Plug your Steam Deck into your dock. The Steam Deck does not come with one automatically, but Valve sells one. Problem is, it sells for around 89$. Expensive stuff. I got an off-brand one for about 40 dollars.
Once the Steam Deck is plugged in, go to the SteamOS recovery site to download the image on another PC you own.
step nine
Now here you have a choice. You need to image a USB with SteamOS 3. They recommend using Etcher, but in my experience just using the Linux command to re-image the USB is better in almost every regard. For Windows users, I find that Rufus is faster than Etcher.
For Windows users:
Plug in your USB. Go to https://rufus.ie/en/ and hit download. Run Rufus as administrator, select the USB as your install device and Steam OS as the recovery image. Hit start, wait for it to be done.
For Linux users:
First, you will need to know what your USB is called. Use lsblk to find it. Most of the time it will be called something like sda or sdb. Exceptions occur, however.
Once that is done, enter (or copy/paste) this command:
| |
Replace the X in sdX with whatever your USB is called. If your USB is called sda, replace the X with an a. if your USB is called sdb, replace the X with a b. You get the idea.
Step 9 is going to take a WHILE. It took my PC about 10 minutes to write to the USB I had.
step ten
Once it is done, plug in the USB into your dock and power on your Steam Deck. If you do not have a dock, use a USBa to USBc adapter, but mind your battery life. USBc is the only port the Deck has, which is what it uses for charging. It’s better to use a dock in case if your battery runs out. Also, your trackpads are unlikely to work so a dock will allow you to use a regular mouse.
The Steam Deck should not have anything on it, so it will usually automatically boot into the BIOS. If not, power it off again and hold down the minus volume button plus the power button at the same time. That signals to the Deck that it needs to boot into the BIOS. It takes a while for some reason. Mine took 10 minutes to load. Be patient, your deck is OK. I promise.
Once it is fully booted, you will be presented with four buttons. If you plugged your mouse into the dock, click on the Boot Manager option. You will see your USB listed. Click that, and it will begin loading into SteamOS.
step eleven
Wait for SteamOS to load. It took my Deck FOREVER to load. I thought I busted it. After 20 minutes of waiting, it finally booted. You will see an option to re-image SteamOS. Do NOT click reinstall. That option is to reinstall SteamOS while keeping your games. You have no games. This will likely not work. Click re-image, go through the prompted steps, and all will be well.

step twelve
Once it is done installing you will need to reboot. Shut down your Deck, unplug the USB, and turn it on again. You will need to sign in to your Wi-Fi and your steam account. Please note, it is likely that none of your buttons or thumb sticks will be working. Mine were not. The mouse will also not work because the Deck will be in gaming mode. Just use the touchscreen to navigate. It works fine.
Once you are logged into Wi-Fi, the Deck will automatically install all the needed updates which include the drivers for the controller. Once the updates are installed, reboot.
Congrats! Everything will be working, and you now have 1 TB of hard drive space to enjoy as many games as you could possibly want.